


安装准备
- 树莓派k8s集群
root@pi4-master01:~# kubectl get nodes -o wide
NAME           STATUS   ROLES    AGE     VERSION    INTERNAL-IP    EXTERNAL-IP   OS-IMAGE           KERNEL-VERSION     CONTAINER-RUNTIME
pi4-master01   Ready    master   4d18h   v1.15.10   192.168.5.18   <none>        Ubuntu 20.04 LTS   5.4.0-1011-raspi   docker://18.9.9
pi4-node01     Ready    node     4d17h   v1.15.10   192.168.5.19   <none>        Ubuntu 20.04 LTS   5.4.0-1011-raspi   docker://18.9.9
pi4-node02     Ready    node     4d17h   v1.15.10   192.168.5.20   <none>        Ubuntu 20.04 LTS   5.4.0-1011-raspi   docker://18.9.9
- 树莓派k8s集群已安装helm和nginx-ingress
root@pi4-master01:~/k8s/cluster-monitoring-0.37.0# helm version
Client: &version.Version{SemVer:"v2.15.0", GitCommit:"c2440264ca6c078a06e088a838b0476d2fc14750", GitTreeState:"clean"}
Server: &version.Version{SemVer:"v2.15.0+unreleased", GitCommit:"9668ad4d90c5e95bd520e58e7387607be6b63bb6", GitTreeState:"dirty"}
root@pi4-master01:~/k8s/cluster-monitoring-0.37.0# helm list
NAME         	REVISION	UPDATED                 	STATUS  	CHART              	APP VERSION	NAMESPACE
nginx-ingress	1       	Fri Jul  3 17:11:20 2020	DEPLOYED	nginx-ingress-0.9.5	0.10.2     	default
root@pi4-master01:~/k8s/cluster-monitoring-0.37.0# kubectl get svc
NAME                            TYPE        CLUSTER-IP      EXTERNAL-IP    PORT(S)                      AGE
kubernetes                      ClusterIP   10.96.0.1       <none>         443/TCP                      4d21h
nginx-ingress-controller        NodePort    10.110.89.242   192.168.5.18   80:12001/TCP,443:12002/TCP   4d16h
nginx-ingress-default-backend   ClusterIP   10.104.65.1     <none>         80/TCP                       4d16h
- 树莓派k8s集群已安装存储类,并设置为默认存储
root@pi4-master01:~/k8s/cluster-monitoring-0.37.0# kubectl get storageclass
NAME                   PROVISIONER             AGE
local-path (default)   rancher.io/local-path   4d15h
对了,如果你还没有树莓派k8s集群,这里有一篇树莓派 k8s 集群入坑指南可以参考,欢迎入坑。
helm安装mysql
这里我们选择用helm安装,helm有一个默认仓库stable,指向https://kubernetes-charts.storage.googleapis.com, 国内访问比较困难,所以网上很多安装helm的文档都以https://kubernetes.oss-cn-hangzhou.aliyuncs.com/charts 来代替。但最近发现,这个仓库也不再更新了,很多chart的最新版本都没有,这里提供一个新地址http://mirror.azure.cn/kubernetes/charts 。经简单验证,发现这个仓库至少比阿里的那个仓库新,建议切换。
root@pi4-master01:~# helm repo remove stable
"stable" has been removed from your repositories
root@pi4-master01:~# helm repo add stable http://mirror.azure.cn/kubernetes/charts/
"stable" has been added to your repositories
root@pi4-master01:~# helm repo list
NAME   	URL
local  	http://127.0.0.1:8879/charts
stable 	http://mirror.azure.cn/kubernetes/charts/
root@pi4-master01:~# helm search mysql
NAME                         	CHART VERSION	APP VERSION	DESCRIPTION
stable/mysql                    	1.6.6        	5.7.30     	Fast, reliable, scalable, and easy to use open-source rel...
stable/mysqldump                	2.6.0        	2.4.1      	A Helm chart to help backup MySQL databases using mysqldump
stable/prometheus-mysql-exporter	0.7.0        	v0.11.0    	A Helm chart for prometheus mysql exporter with cloudsqlp...
- 使用helm安装mysql命令如下
helm install -n mysql \
stable/mysql \
--set image=biarms/mysql \
--set imageTag=5.7.30-linux-arm64v8 \
--set busybox.images=arm64v8/busybox \
--set mysqlRootPassword=abc123
该chart中涉及的镜像均是x86的,只要把相关的镜像换成arm64v8架构的镜像即可。另外,该chart默认开启了持久化存储,不指定storageclass的话,将使用k8s的默认存储。因为我们的树莓派k8s集群已经设置了local-path为默认storageclass,所以不需要关闭持久化存储既可正常安装。
- 查看创建的pod
root@pi4-master01:~# kubectl get pod | grep mysql
mysql-56b767d54b-tfrng                           1/1     Running   0          89m
- 查看创建的svc
root@pi4-master01:~# kubectl get svc | grep mysql
mysql                           ClusterIP   10.108.134.203   <none>         3306/TCP                     90m
- 查看创建的pv,pvc
root@pi4-master01:~# kubectl get pvc,pv
NAME                          STATUS   VOLUME                                     CAPACITY   ACCESS MODES   STORAGECLASS   AGE
persistentvolumeclaim/mysql   Bound    pvc-7e596f23-af80-480f-8713-fe3dc9e42157   8Gi        RWO            local-path     91m

NAME                                                        CAPACITY   ACCESS MODES   RECLAIM POLICY   STATUS   CLAIM                                           STORAGECLASS   REASON   AGE
persistentvolume/pvc-7e596f23-af80-480f-8713-fe3dc9e42157   8Gi        RWO            Delete           Bound    default/mysql                                   local-path
验证
- 进入mysql容器
root@pi4-master01:~# kubectl exec -it mysql-56b767d54b-tfrng bash
root@mysql-56b767d54b-tfrng:/#
- 连接mysql服务
root@mysql-56b767d54b-tfrng:/# mysql -uroot -pabc123
mysql: [Warning] Using a password on the command line interface can be insecure.
Welcome to the MySQL monitor.  Commands end with ; or \g.
Your MySQL connection id is 1128
Server version: 5.7.30-0ubuntu0.18.04.1 (Ubuntu)

Copyright (c) 2000, 2020, Oracle and/or its affiliates. All rights reserved.

Oracle is a registered trademark of Oracle Corporation and/or its
affiliates. Other names may be trademarks of their respective
owners.

Type 'help;' or '\h' for help. Type '\c' to clear the current input statement.

mysql> status
--------------
mysql  Ver 14.14 Distrib 5.7.30, for Linux (aarch64) using  EditLine wrapper

Connection id:		1128
Current database:
Current user:		root@localhost
SSL:			Not in use
Current pager:		stdout
Using outfile:		''
Using delimiter:	;
Server version:		5.7.30-0ubuntu0.18.04.1 (Ubuntu)
Protocol version:	10
Connection:		Localhost via UNIX socket
Server characterset:	latin1
Db     characterset:	latin1
Client characterset:	latin1
Conn.  characterset:	latin1
UNIX socket:		/var/run/mysqld/mysqld.sock
Uptime:			1 hour 33 min 54 sec

Threads: 1  Questions: 2259  Slow queries: 0  Opens: 113  Flush tables: 1  Open tables: 0  Queries per second avg: 0.400
--------------

mysql>
基于helm在树莓派k8s集群安装mysql还是很方便的,只需要使用arm64v8架构的镜像即可。但是如果想更部署的mysql更具有个性,还是很有必要研究一下该chart的其它配置项,这些配置项我们可以通过helm inspect命令来查看
root@pi4-master01:~# helm inspect values stable/mysql
## mysql image version
## ref: https://hub.docker.com/r/library/mysql/tags/
##
image: "mysql"
imageTag: "5.7.30"

strategy:
  type: Recreate

busybox:
  image: "busybox"
  tag: "1.32"

testFramework:
  enabled: true
  image: "bats/bats"
  tag: "1.2.1"
  imagePullPolicy: IfNotPresent
  securityContext: {}

## Specify password for root user
##
## Default: random 10 character string
# mysqlRootPassword: testing

## Create a database user
##
# mysqlUser:
## Default: random 10 character string
# mysqlPassword:

## Allow unauthenticated access, uncomment to enable
##
# mysqlAllowEmptyPassword: true

## Create a database
##
# mysqlDatabase:

## Specify an imagePullPolicy (Required)
## It's recommended to change this to 'Always' if the image tag is 'latest'
## ref: http://kubernetes.io/docs/user-guide/images/#updating-images
##
imagePullPolicy: IfNotPresent

## Additionnal arguments that are passed to the MySQL container.
## For example use --default-authentication-plugin=mysql_native_password if older clients need to
## connect to a MySQL 8 instance.
args: []

extraVolumes: |
  # - name: extras
  #   emptyDir: {}

extraVolumeMounts: |
  # - name: extras
  #   mountPath: /usr/share/extras
  #   readOnly: true

extraInitContainers: |
  # - name: do-something
  #   image: busybox
  #   command: ['do', 'something']

## A string to add extra environment variables
# extraEnvVars: |
#   - name: EXTRA_VAR
#     value: "extra"

# Optionally specify an array of imagePullSecrets.
# Secrets must be manually created in the namespace.
# ref: https://kubernetes.io/docs/concepts/containers/images/#specifying-imagepullsecrets-on-a-pod
# imagePullSecrets:
  # - name: myRegistryKeySecretName

## Node selector
## ref: https://kubernetes.io/docs/concepts/configuration/assign-pod-node/#nodeselector
nodeSelector: {}

## Affinity
## ref: https://kubernetes.io/docs/concepts/configuration/assign-pod-node/#affinity-and-anti-affinity
affinity: {}

## Tolerations for pod assignment
## Ref: https://kubernetes.io/docs/concepts/configuration/taint-and-toleration/
##
tolerations: []

livenessProbe:
  initialDelaySeconds: 30
  periodSeconds: 10
  timeoutSeconds: 5
  successThreshold: 1
  failureThreshold: 3

readinessProbe:
  initialDelaySeconds: 5
  periodSeconds: 10
  timeoutSeconds: 1
  successThreshold: 1
  failureThreshold: 3

## Persist data to a persistent volume
persistence:
  enabled: true
  ## database data Persistent Volume Storage Class
  ## If defined, storageClassName: <storageClass>
  ## If set to "-", storageClassName: "", which disables dynamic provisioning
  ## If undefined (the default) or set to null, no storageClassName spec is
  ##   set, choosing the default provisioner.  (gp2 on AWS, standard on
  ##   GKE, AWS & OpenStack)
  ##
  # storageClass: "-"
  accessMode: ReadWriteOnce
  size: 8Gi
  annotations: {}

## Use an alternate scheduler, e.g. "stork".
## ref: https://kubernetes.io/docs/tasks/administer-cluster/configure-multiple-schedulers/
##
# schedulerName:

## Security context
securityContext:
  enabled: false
  runAsUser: 999
  fsGroup: 999

## Configure resource requests and limits
## ref: http://kubernetes.io/docs/user-guide/compute-resources/
##
resources:
  requests:
    memory: 256Mi
    cpu: 100m

# Custom mysql configuration files path
configurationFilesPath: /etc/mysql/conf.d/

# Custom mysql configuration files used to override default mysql settings
configurationFiles: {}
#  mysql.cnf: |-
#    [mysqld]
#    skip-name-resolve
#    ssl-ca=/ssl/ca.pem
#    ssl-cert=/ssl/server-cert.pem
#    ssl-key=/ssl/server-key.pem

# Custom mysql init SQL files used to initialize the database
initializationFiles: {}
#  first-db.sql: |-
#    CREATE DATABASE IF NOT EXISTS first DEFAULT CHARACTER SET utf8 DEFAULT COLLATE utf8_general_ci;
#  second-db.sql: |-
#    CREATE DATABASE IF NOT EXISTS second DEFAULT CHARACTER SET utf8 DEFAULT COLLATE utf8_general_ci;

metrics:
  enabled: false
  image: prom/mysqld-exporter
  imageTag: v0.10.0
  imagePullPolicy: IfNotPresent
  resources: {}
  annotations: {}
    # prometheus.io/scrape: "true"
    # prometheus.io/port: "9104"
  livenessProbe:
    initialDelaySeconds: 15
    timeoutSeconds: 5
  readinessProbe:
    initialDelaySeconds: 5
    timeoutSeconds: 1
  flags: []
  serviceMonitor:
    enabled: false
    additionalLabels: {}

## Configure the service
## ref: http://kubernetes.io/docs/user-guide/services/
service:
  annotations: {}
  ## Specify a service type
  ## ref: https://kubernetes.io/docs/concepts/services-networking/service/#publishing-services---service-types
  type: ClusterIP
  port: 3306
  # nodePort: 32000
  # loadBalancerIP:

## Pods Service Account
## ref: https://kubernetes.io/docs/tasks/configure-pod-container/configure-service-account/
serviceAccount:
  ## Specifies whether a ServiceAccount should be created
  ##
  create: false
  ## The name of the ServiceAccount to use.
  ## If not set and create is true, a name is generated using the mariadb.fullname template
  # name:

ssl:
  enabled: false
  secret: mysql-ssl-certs
  certificates:
#  - name: mysql-ssl-certs
#    ca: |-
#      -----BEGIN CERTIFICATE-----
#      ...
#      -----END CERTIFICATE-----
#    cert: |-
#      -----BEGIN CERTIFICATE-----
#      ...
#      -----END CERTIFICATE-----
#    key: |-
#      -----BEGIN RSA PRIVATE KEY-----
#      ...
#      -----END RSA PRIVATE KEY-----

## Populates the 'TZ' system timezone environment variable
## ref: https://dev.mysql.com/doc/refman/5.7/en/time-zone-support.html
##
## Default: nil (mysql will use image's default timezone, normally UTC)
## Example: 'Australia/Sydney'
# timezone:

# Deployment Annotations
deploymentAnnotations: {}

# To be added to the database server pod(s)
podAnnotations: {}
podLabels: {}

## Set pod priorityClassName
# priorityClassName: {}


## Init container resources defaults
initContainer:
  resources:
    requests:
      memory: 10Mi
      cpu: 10m
显然,配置项很丰富,从mysql的配置文件、mysql启动pod的时区、是否开启监控都能支持。
开启监控
开启监控前,需要在集群部署prometheus,否则不会有效果。可以参考树莓派k8s集群安装监控prometheus进行部署。
开启监控,需要设置metrics.enabled和metrics.serviceMonitor.enabled为true,且metrics.image需要设置为支持arm64v8架构的镜像监控才能使用,这里选择的镜像是pi4k8s/prom-mysqld-exporter:v0.12.1,具体的Dockerfile参考如下
FROM arm64v8/ubuntu:18.04

RUN  sed -i "s/ports.ubuntu.com/mirrors.aliyun.com/g" /etc/apt/sources.list \
     && cd opt && apt update && apt upgrade -y \
     && apt -y install wget \
     && wget -q "https://github.com/prometheus/mysqld_exporter/releases/download/v0.12.1/mysqld_exporter-0.12.1.linux-arm64.tar.gz" \
     && tar -zxf mysqld_exporter-0.12.1.linux-arm64.tar.gz \
     && rm -rf mysqld_exporter-0.12.1.linux-arm64.tar.gz \
     && apt remove -y --purge wget && apt clean \
     && rm -rf /tmp/* /var/cache/* /usr/share/doc/* /usr/share/man/* /var/lib/apt/lists/* \
     && mv /opt/mysqld_exporter-0.12.1.linux-arm64/mysqld_exporter /bin/mysqld_exporter

USER        nobody
EXPOSE      9104
ENTRYPOINT  [ "/bin/mysqld_exporter" ]

# arm64v8
# docker build . -t pi4k8s/prom-mysqld-exporter:v0.12.1
使用helm安装开启监控的mysql命令如下
helm install -n mysql \
stable/mysql \
--set image=biarms/mysql \
--set imageTag=5.7.30-linux-arm64v8 \
--set busybox.image=arm64v8/busybox \
--set mysqlRootPassword=abc123 \
--set metrics.enabled=true \
--set metrics.image=pi4k8s/prom-mysqld-exporter \
--set metrics.imageTag=v0.12.1 \
--set metrics.serviceMonitor.enabled=true
确认安装状态
root@pi4-master01:~# kubectl get po|grep mysql
mysql-7b74677bf4-shchz                           2/2     Running   0          11h
root@pi4-master01:~# kubectl get svc|grep mysql
mysql                           ClusterIP   10.107.31.127   <none>         3306/TCP,9104/TCP            11h
root@pi4-master01:~# kubectl get servicemonitor|grep mysql
mysql   11h
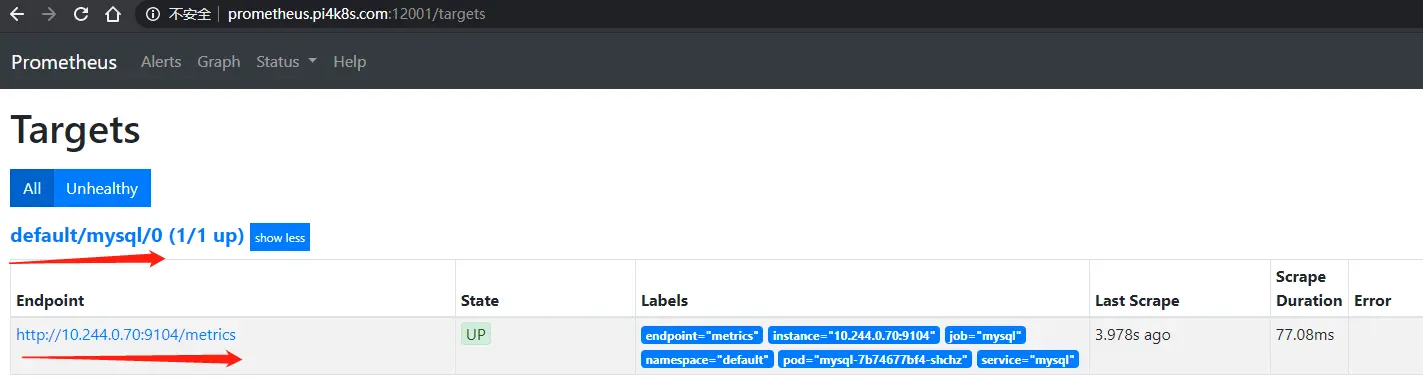
在prometheus查看exporter是否生效
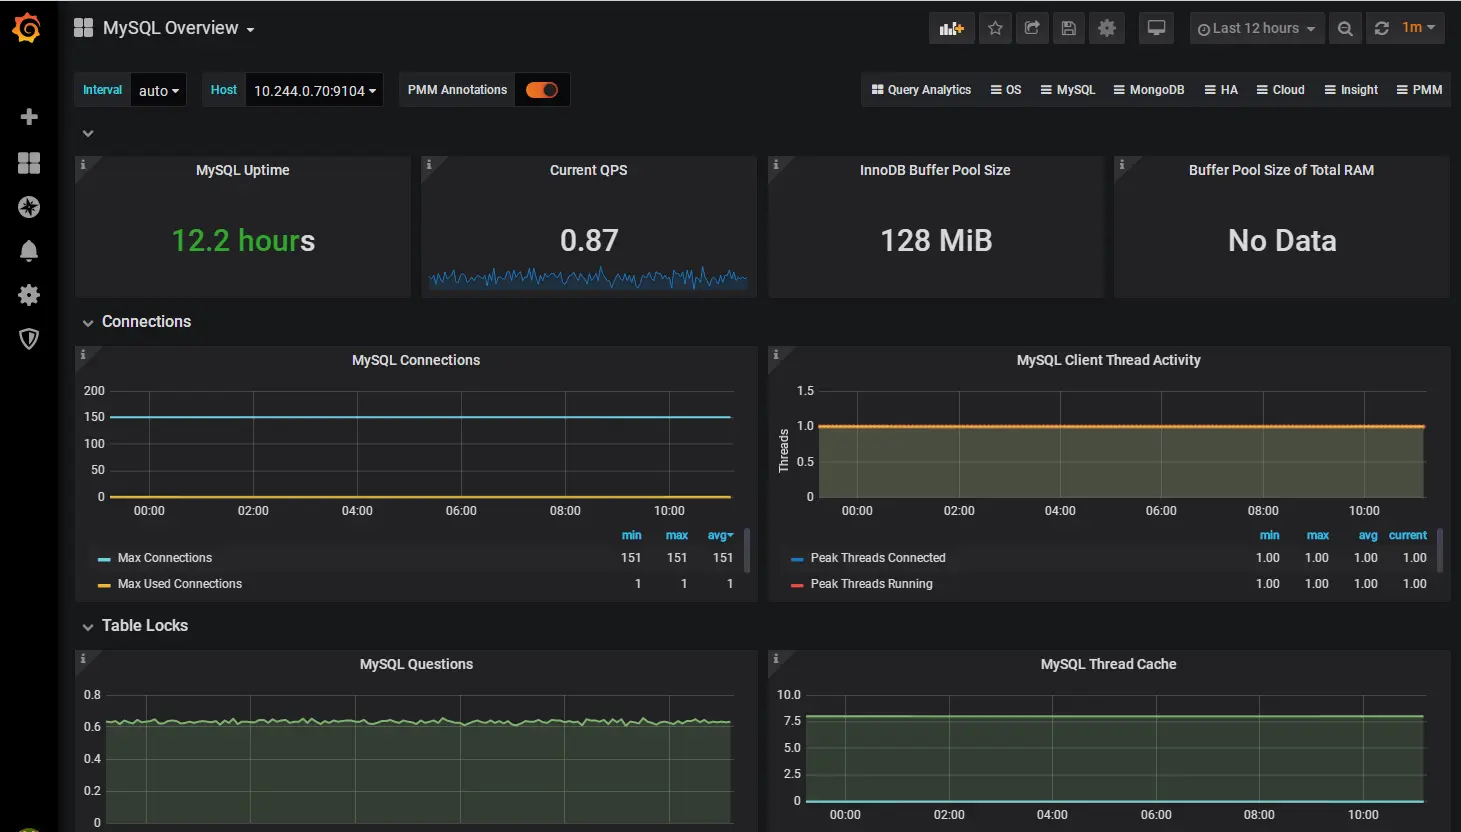
生效后在grafana系统配置mysql监控面板
- mysql监控面板 :https://grafana.com/grafana/dashboards/7362
部署步骤如下:
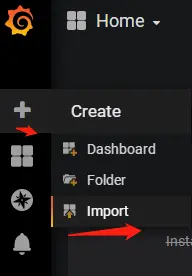
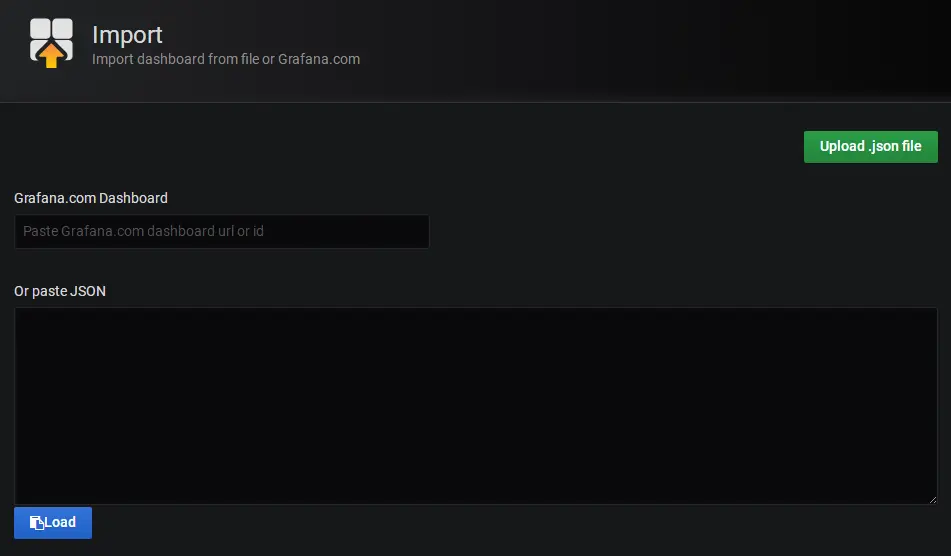
点"Upload .json file"按钮,选择已经下载好的mysql监控面板文件 ,进入面试设置界面如下
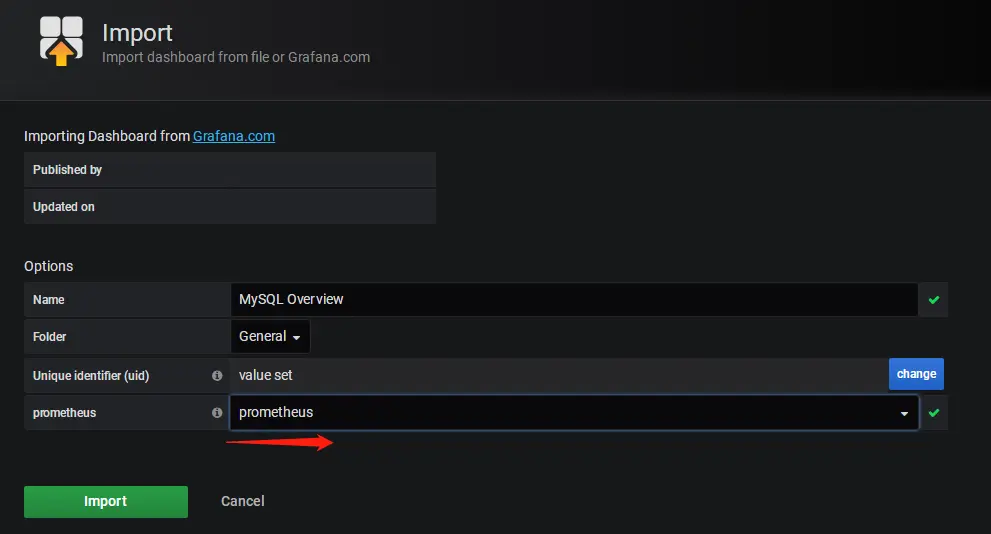
设置好相应参数后,点"Import"按钮,继续导入,引导入mysql监控页面如下
总结
本实践简单介绍了如何使用chart在树莓派k8s集群用helm部署mysql并配置对于mysql的监控,读者可以基于自己的需要自行调整mysql参数以便适用更多场景。
参考:


评论区