


consul简介
Consul是一个服务网格(微服务间的 TCP/IP,负责服务之间的网络调用、限流、熔断和监控)解决方案,它是一个一个分布式的,高度可用的系统,而且开发使用都很简便。它提供了一个功能齐全的控制平面,主要特点是:服务发现、健康检查、键值存储、安全服务通信、多数据中心。
安装准备
- 树莓派k8s集群
root@pi4-master01:~# kubectl get nodes -o wide
NAME           STATUS   ROLES    AGE     VERSION    INTERNAL-IP    EXTERNAL-IP   OS-IMAGE           KERNEL-VERSION     CONTAINER-RUNTIME
pi4-master01   Ready    master   4d18h   v1.15.10   192.168.5.18   <none>        Ubuntu 20.04 LTS   5.4.0-1011-raspi   docker://18.9.9
pi4-node01     Ready    node     4d17h   v1.15.10   192.168.5.19   <none>        Ubuntu 20.04 LTS   5.4.0-1011-raspi   docker://18.9.9
pi4-node02     Ready    node     4d17h   v1.15.10   192.168.5.20   <none>        Ubuntu 20.04 LTS   5.4.0-1011-raspi   docker://18.9.9
- 树莓派k8s集群已安装helm
root@pi4-master01:~/k8s/cluster-monitoring-0.37.0# helm version
Client: &version.Version{SemVer:"v2.15.0", GitCommit:"c2440264ca6c078a06e088a838b0476d2fc14750", GitTreeState:"clean"}
Server: &version.Version{SemVer:"v2.15.0+unreleased", GitCommit:"9668ad4d90c5e95bd520e58e7387607be6b63bb6", GitTreeState:"dirty"}
- 树莓派k8s集群已安装存储类,并设置为默认存储
root@pi4-master01:~/k8s/cluster-monitoring-0.37.0# kubectl get storageclass
NAME                   PROVISIONER             AGE
local-path (default)   rancher.io/local-path   4d15h
对了,如果你还没有树莓派k8s集群,这里有一篇树莓派 k8s 集群入坑指南可以参考,欢迎入坑。
helm安装consul集群
这里我们选择用helm安装,helm有一个默认仓库stable,指向https://kubernetes-charts.storage.googleapis.com, 国内访问比较困难,所以网上很多安装helm的文档都以https://kubernetes.oss-cn-hangzhou.aliyuncs.com/charts 来代替。但最近发现,这个仓库也不再更新了,很多chart的最新版本都没有,这里提供一个新地址http://mirror.azure.cn/kubernetes/charts 。经简单验证,发现这个仓库至少比阿里的那个仓库新,建议切换。
root@pi4-master01:~# helm repo remove stable
"stable" has been removed from your repositories
root@pi4-master01:~# helm repo add stable http://mirror.azure.cn/kubernetes/charts/
"stable" has been added to your repositories
root@pi4-master01:~# helm repo list
NAME   	URL
local  	http://127.0.0.1:8879/charts
stable 	http://mirror.azure.cn/kubernetes/charts/
root@k8s-master:~# helm search consul
NAME                     	CHART VERSION	APP VERSION	DESCRIPTION
NAME                             	CHART VERSION	APP VERSION	DESCRIPTION
stable/consul                    	3.9.6        	1.5.3      	Highly available and distributed service discovery and ke...
stable/prometheus-consul-exporter	0.1.5        	0.4.0      	A Helm chart for the Prometheus Consul Exporter
stable/consul就是我们需要安装的chart。
- 使用helm安装consul集群命令如下
helm install -n consul \
stable/consul \
--set image=arm64v8/consul
通过上述命令,将以默认的配置在Kubernetes中部署consul集群。默认情况下,chart会安装部署3个consul节点。
该chart中涉及的consul镜像是x86的,只要把镜像换成arm64v8架构的镜像即可。另外,该chart默认开启了持久化存储,不指定storageclass的话,将使用k8s的默认存储。因为我们的树莓派k8s集群已经设置了local-path为默认storageclass,所以不需要关闭持久化存储既可正常安装。
- 查看创建的pod
root@pi4-master01:~# kubectl get po|grep consul
consul-0                                         1/1     Running   0          6m30s
consul-1                                         1/1     Running   0          5m28s
consul-2                                         1/1     Running   0          4m36s
- 查看创建的svc
root@pi4-master01:~# kubectl get svc|grep consul
consul                          ClusterIP   None            <none>         8500/TCP,8400/TCP,8301/TCP,8301/UDP,8302/TCP,8302/UDP,8300/TCP,8600/TCP,8600/UDP   6m58s
consul-ui                       NodePort    10.96.189.212   <none>         8500:5514/TCP                                                                      6m58s
- 查看创建的pv,pvc
root@pi4-master01:~# kubectl get svc|grep consul
consul                          ClusterIP   None            <none>         8500/TCP,8400/TCP,8301/TCP,8301/UDP,8302/TCP,8302/UDP,8300/TCP,8600/TCP,8600/UDP   6m58s
consul-ui                       NodePort    10.96.189.212   <none>         8500:5514/TCP                                                                      6m58s
root@pi4-master01:/home/charts/stable# kubectl get pvc,pv|grep consul
persistentvolumeclaim/datadir-consul-0                          Bound    pvc-5152f066-7500-40ed-b008-a2c037b499bf   1Gi        RWO            local-path     7m37s
persistentvolumeclaim/datadir-consul-1                          Bound    pvc-176f02f6-3e5d-4cf2-a506-0348b397e33c   1Gi        RWO            local-path     6m35s
persistentvolumeclaim/datadir-consul-2                          Bound    pvc-b7dd4760-caf7-43f7-82ae-1dcf36e0618c   1Gi        RWO            local-path     5m43s

persistentvolume/pvc-176f02f6-3e5d-4cf2-a506-0348b397e33c   1Gi        RWO            Delete           Bound    default/datadir-consul-1                          local-path              6m31s
persistentvolume/pvc-5152f066-7500-40ed-b008-a2c037b499bf   1Gi        RWO            Delete           Bound    default/datadir-consul-0                          local-path              7m34s
persistentvolume/pvc-b7dd4760-caf7-43f7-82ae-1dcf36e0618c   1Gi        RWO            Delete           Bound    default/datadir-consul-2                          local-path              5m40s
验证
访问http://192.168.5.18:5514/ui/dc1/services ,页面显示如下
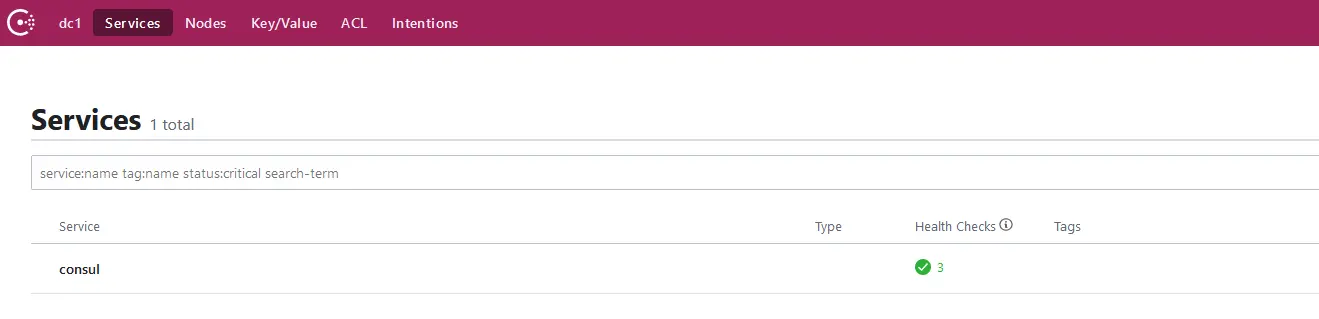
该chart默认使用的consul镜像是consul:v1.5.3。
- 查看当前consul版本
root@pi4-master01:~#  kubectl exec consul-0  -- sh -c 'consul version'
Consul v1.5.3
Protocol 2 spoken by default, understands 2 to 3 (agent will automatically use protocol >2 when speaking to compatible agents)
可以看到对应consul的版本是v1.5.3。
- 查看consul集群信息
root@pi4-master01:~# kubectl exec consul-0  -- sh -c 'consul members'
Node      Address            Status  Type    Build  Protocol  DC   Segment
consul-0  10.244.0.184:8301  alive   server  1.5.3  2         dc1  <all>
consul-1  10.244.2.110:8301  alive   server  1.5.3  2         dc1  <all>
consul-2  10.244.1.107:8301  alive   server  1.5.3  2         dc1  <all>
- 动态伸缩能力验证
默认安装是3个节点
root@pi4-master01:~# kubectl get po|grep consul
consul-0                                         1/1     Running      0          36m
consul-1                                         1/1     Running      0          35m
consul-2                                         1/1     Running      0          35m
将consul水平扩容为5个节点
root@pi4-master01:~# kubectl patch statefulset/consul -p '{"spec":{"replicas": 5}}'
statefulset.apps/consul patched
root@pi4-master01:~# kubectl get po|grep consul
consul-0                                         1/1     Running      0          38m
consul-1                                         1/1     Running      0          37m
consul-2                                         1/1     Running      0          36m
consul-3                                         1/1     Running      0          6m27s
consul-4                                         1/1     Running      0          6m4s
将consul水平缩容为3个节点
root@pi4-master01:~# kubectl patch statefulset/consul -p '{"spec":{"replicas": 3}}'
statefulset.apps/consul patched
root@pi4-master01:~# kubectl get po|grep consul
consul-0                                         1/1     Running      0          38m
consul-1                                         1/1     Running      0          37m
consul-2                                         1/1     Running      0          36m
其它配置
基于helm在树莓派k8s集群安装consul集群还是很方便的,只需要使用arm64v8架构的镜像即可。但是如果想要部署的consul集群更具有个性,还是很有必要研究一下该chart的其它配置项,这些配置项我们可以通过helm inspect命令来查看
root@pi4-master01:~# helm inspect values stable/consul
# Default values for consul.
# This is a YAML-formatted file.
# Declare name/value pairs to be passed into your templates.
# name: value

## Consul service ports
HttpPort: 8500
RpcPort: 8400
SerflanPort: 8301
SerflanUdpPort: 8301
SerfwanPort: 8302
SerfwanUdpPort: 8302
ServerPort: 8300
ConsulDnsPort: 8600

## Specify the domain with which consul should run with
## This will be passed as a -domain parameter
Domain: consul

## Used as selector
Component: "consul"
Replicas: 3
Image: "consul"
ImageTag: "1.5.3"
ImagePullPolicy: "Always"
Resources: {}
 # requests:
 #   cpu: "100m"
 #   memory: "256Mi"
 # limits:
 #   cpu: "500m"
 #   memory: "512Mi"
## Persistent volume size

priorityClassName: ""

Storage: "1Gi"

## Needed for 0.8.0 and later IF all consul containers are spun up
## on the same machine. Without this they all generate the same
## host id.
DisableHostNodeId: false

## Datacenter name for consul. If not supplied, will use the consul
## default 'dc1'
# DatacenterName: dc1

## Explicitly set LAN hosts to join.
# Added as -retry-join argument
# If you set joinPeers then we will not auto-build the list of peers for you
# These hostnames will be verified to be resolvable and ping-able before the consul service will start
joinPeers: []

## Set list of WAN hosts to join
# Added as -retry-join-wan argument
# These hostnames will be verified to be resolvable before the consul service will start
joinWan: []

## Encrypt Gossip Traffic
Gossip:
  Encrypt: true
  Create: true

## predefined value for gossip key.
## Will use a generated random alpha numeric if not provided
# GossipKey: key

## consul data Persistent Volume Storage Class
## If defined, StorageClassName: <storageClass>
## If set to "-", StorageClassName: "", which disables dynamic provisioning
## If undefined (the default) or set to null, no storageClassName spec is
##   set, choosing the default provisioner.  (gp2 on AWS, standard on
##   GKE, AWS & OpenStack)
##
# StorageClass: "-"

## Setting maxUnavailable will create a pod disruption budget that will prevent
## voluntarty cluster administration from taking down too many consul pods. If
## you set maxUnavailable, you should set it to ceil((n/2) - 1), where
## n = Replicas. For example, if you have 5 or 6 Replicas, you'll want to set
## maxUnavailable = 2. If you are using the default of 3 Replicas, you'll want
## to set maxUnavailable to 1.
maxUnavailable: 1

## nodeAffinity settings
# nodeAffinity:
#   requiredDuringSchedulingIgnoredDuringExecution:
#     nodeSelectorTerms:
#     - matchExpressions:
#       - key: cloud.google.com/gke-preemptible
#         operator: NotIn
#         values:
#         - true

## Affinity settings
affinity: |
  podAntiAffinity:
    preferredDuringSchedulingIgnoredDuringExecution:
    - weight: 1
      podAffinityTerm:
        topologyKey: kubernetes.io/hostname
        labelSelector:
          matchExpressions:
          - key: component
            operator: In
            values:
            - "{{ .Release.Name }}-{{ .Values.Component }}"

## Enable Consul Web UI
##
ui:
  enabled: true
## Create dedicated UI service
##
uiService:
  enabled: true
  type: "NodePort"
  annotations: {}

ConsulConfig: []
#  - type: secret
#    name: consul-defaults
#  - type: configMap
#    name: consul-defaults

## Create an Ingress for the Web UI
uiIngress:
  enabled: false
  annotations: {}
  labels: {}
  hosts: []
  path: /
  tls: []

## Useful when ACLs are enabled
acl:
  enabled: false
  masterToken: ""
  agentToken: ""

## test container details
test:
  image: lachlanevenson/k8s-kubectl
  imageTag: v1.4.8-bash
  rbac:
    create: false
    serviceAccountName: ""

nodeSelector: {}
tolerations: []
additionalLabels: {}
podAnnotations: {}

# Lifecycle for StatefulSet
# lifecycle:
#   preStop:
#     exec:
#       command:
#       - sh
#       - -c
#       - "sleep 60"
forceIpv6: false
显然,配置项很丰富,从端口配置、是否开启ingress都能支持。
安装监控
安装监控前,需要在集群部署prometheus,否则不会有效果。可以参考树莓派k8s集群安装监控prometheus进行部署。
consul的监控需要单独安装,这里我们选择https://github.com/pi4k8s/pi4charts/tree/master/monitor/charts/consul-monitor 进行安装,该仓库内置的镜像是prom/consul-exporter:latest,该镜像支持多架构,可以同时支持arm64v8和x86。
使用helm安装开consul监控命令如下
root@pi4-master01:~# git clone https://github.com/pi4k8s/pi4charts.git
root@pi4-master01:~# cd pi4charts
root@pi4-master01:~/pi4charts# helm install -n consul-monitor \
monitor/charts/consul-monitor/ \
--set consulServer=consul:8500
确认安装状态
root@pi4-master01:~# kubectl get pod | grep consul
consul-0                                         1/1     Running      0          3h48m
consul-1                                         1/1     Running      0          3h47m
consul-2                                         1/1     Running      0          3h46m
consul-monitor-f68cdb4d-w72zq                    1/1     Running      0          68s
root@pi4-master01:~# kubectl get svc | grep consul
consul                          ClusterIP   None            <none>         8500/TCP,8400/TCP,8301/TCP,8301/UDP,8302/TCP,8302/UDP,8300/TCP,8600/TCP,8600/UDP   3h48m
consul-monitor                  ClusterIP   10.111.89.48    <none>         9107/TCP                                                                           112s
consul-ui                       NodePort    10.96.189.212   <none>         8500:5514/TCP                                                                      3h48m
root@pi4-master01:~#  kubectl get servicemonitor --all-namespaces |grep consul
default      consul-monitor            2m42s
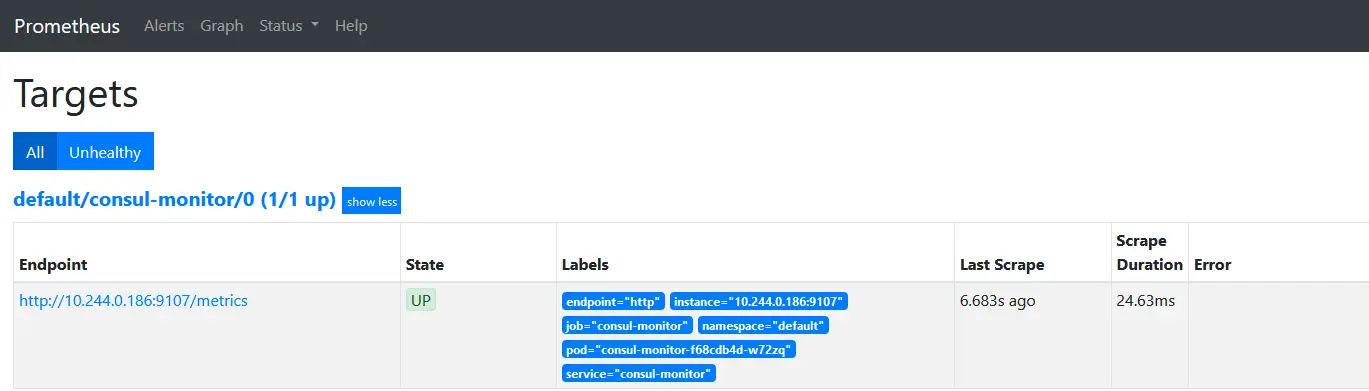
在prometheus查看exporter是否生效
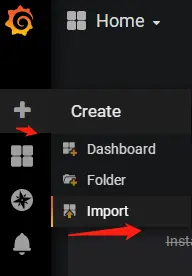
生效后在grafana系统配置consul监控面板
- consul监控面板 :https://grafana.com/grafana/dashboards/12049
部署步骤如下:
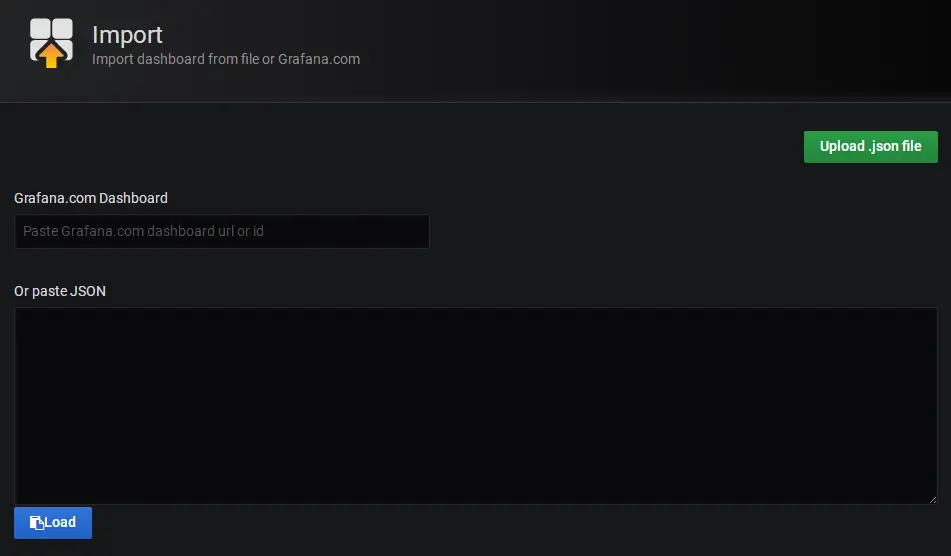
点"Upload .json file"按钮,选择已经下载好的consul监控面板文件 ,进入面板设置界面如下
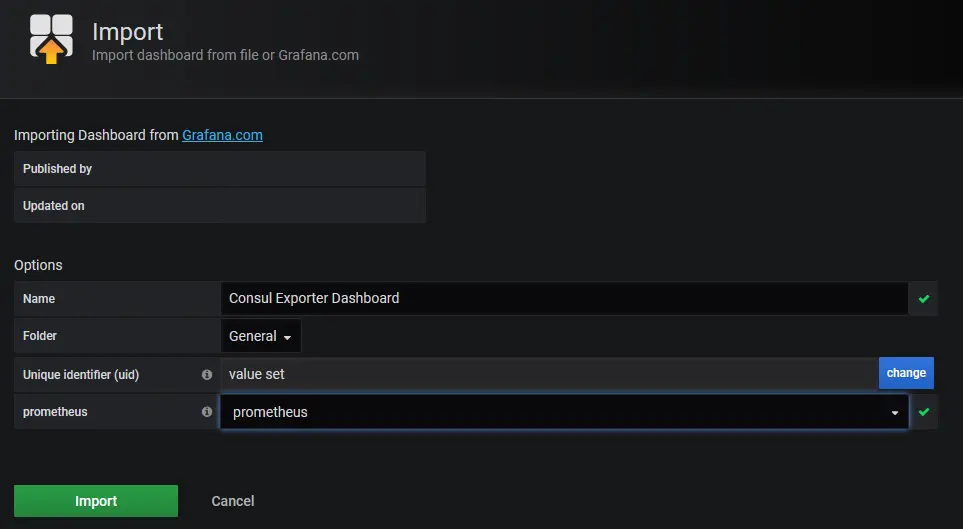
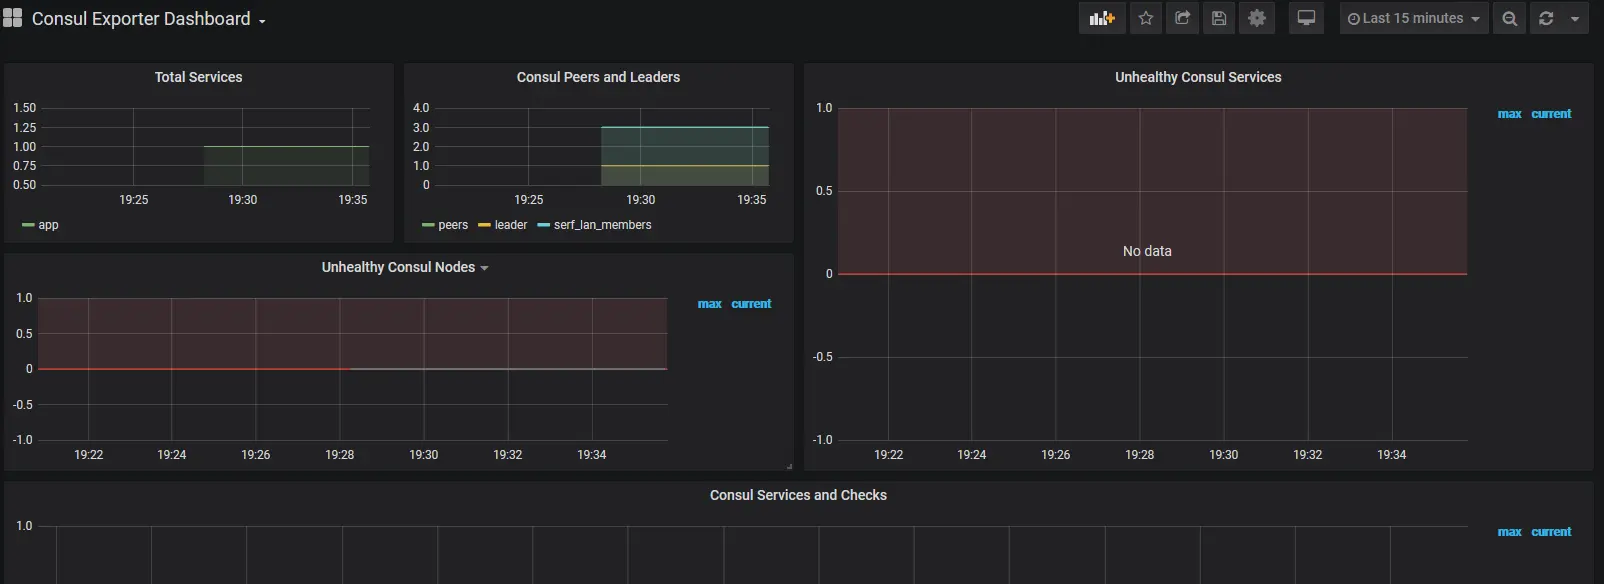
设置好相应参数后,点"Import"按钮,继续导入,引导入consul监控页面如下
总结
本实践简单介绍了如何使用chart在树莓派k8s集群用helm部署consul和consul-monitor,读者可以基于自己的需要自行调整consul参数以便适用更多场景。
参考:


评论区